Threejs
官网:https://threejs.org/
github仓库:https://github.com/mrdoob/three.js
环境
本地
下载依赖包
- 核心文件:在官方仓库的
/build下的three.module.js
- 插件:在
/examples/jsm下
本地运行
vscode安装live-server插件,右键想要运行的html文件,点击Open with Live Server
引入threejs:
1
2
3
4
5
6
7
8
9
10
11
12
13
14
15
16
|
<script type="importmap">
{
"imports": {
"three": "./build/three.module.js"
}
}
</script>
<script type="module">
import * as THREE from 'three';
console.log(THREE.Scene);
</script>
|
type="importmap"用于模块路径映射,减少打包工具的依赖。type="module"是现代前端开发的标准方式,支持 import/export。
基本概念
场景Scene:虚拟的3D场景
几何体Geometry:文档搜索geometry,可以找到不同几何体的创建和实例
材质Material:定义物体的外观效果
网格模型Mesh:将几何体和材质结合,形成可以在3D场景中渲染的物体
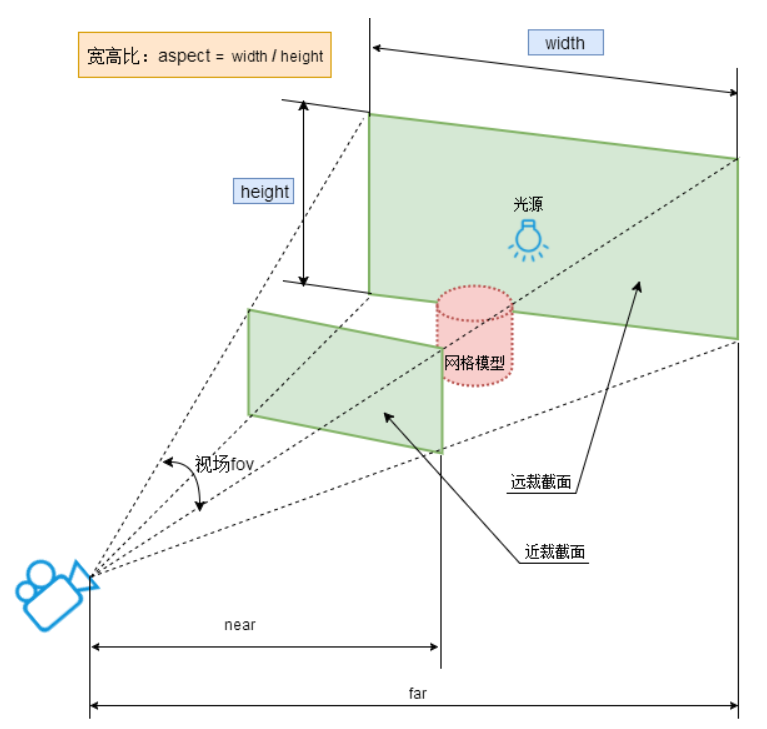
相机Camera:想把三维场景Scene渲染到web网页上,还需要定义一个虚拟相机
1
2
|
PerspectiveCamera( fov : Number, aspect : Number, near : Number, far : Number )
|
渲染器Renderer:将 3D 场景 和 相机 渲染到 HTML <canvas>元素上
1
2
3
4
5
6
7
8
9
10
11
12
13
14
15
16
17
18
19
20
21
22
23
|
const scene = new THREE.Scene();
const geometry = new THREE.BoxGeometry( 1, 1, 1 );
const material = new THREE.MeshBasicMaterial( {color: 0x00ff00} );
const cube = new THREE.Mesh( geometry, material );
scene.add( cube );
const width = 800;
const height = 500;
const camera = new THREE.PerspectiveCamera(30, width / height, 1, 3000);
camera.lookAt(cube.position);
scene.add( camera );
const renderer = new THREE.WebGLRenderer();
renderer.setSize(width, height);
renderer.render(scene, camera);
document.getElementById('webgl').appendChild(renderer.domElement);
|